

How To Change Fan Speed On Windows 10

All too oftentimes, the fan profiles that PCs and laptop ship with fit into ii categories: they sound like a vacuum cleaner or they're so tranquility that your CPU is essentially on fire. As a outcome, manual fan speed control is oft a necessity to maximize functioning or silence, with SpeedFan the widely accepted fan controller to achieve that goal.
Why is fan speed control important?
A device with high-spec internals but poor cooling may likewise just transport with worse hardware. If y'all have a low fan speed in Windows 10, it can lead to thermal throttling as before long as the device comes nether load. Naturally, blowing hot air out of a PC does a lot to keep all of the internals cool, ensuring it doesn't become an oven for your internals.
An optimized profile is particularly of import when information technology comes to CPU fan control, particularly in laptops. Laptops often ship with slower processors than their desktop counterparts to begin with, and thermal throttling can farther reduce clock speeds and other factors until your PC starts to slow downward.
Thankfully, about OEMs build in laptop fan speed control, and in information technology's basically guaranteed that a PC fan speed controller will work. Yous don't need your blowers at 100% 24/7 either – the ideal curve will accept your device serenity under load just ramp things up once you commencement doing intensive tasks like gaming. We're going to bear witness you how to apply speed fan to control and check your fan speed in Windows x in search of that perfect middle-ground.
How to Use Speed Fan for Windows Fan Control
The first step to check fan speed is to download and install SpeedFan. We won't insult your intelligence by walking y'all through the install wizard, merely here's a handy link to a download page.
- Check fan speed and open configuration
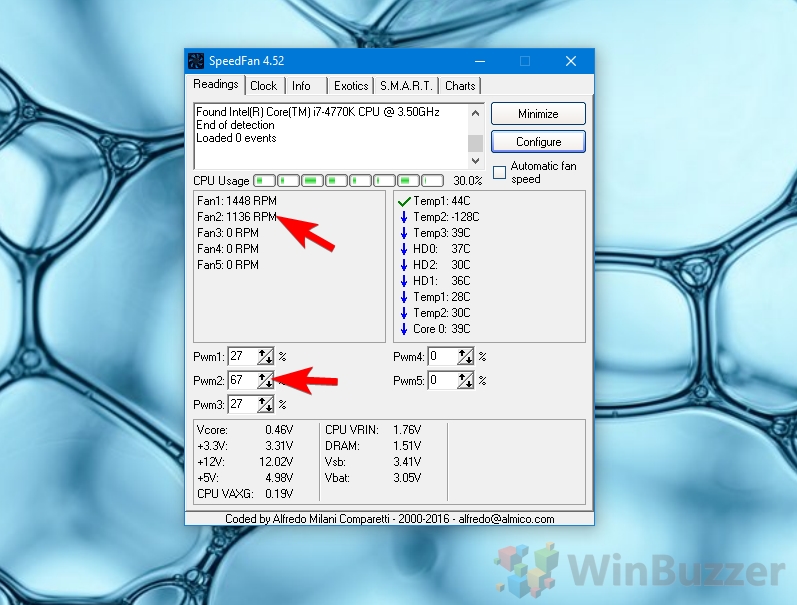
Y'all'll exist bombarded with some information on opening Speed Fan. On the left-hand side are the fans' revolutions per minute, or RPM, while the right-hand side crucially shows the temperature of your core components. You should check this both at balance and nether load before nosotros become started. A tick means that your hardware is running within expected temperatures, a down-arrow that information technology'due south squeamish and absurd, and a flame that information technology's too hot. Maximum rated temps vary depending on the hardware, merely you lot should by and large be very concerned if a temperature is over 85C.
Once you've noted this data down, click "Configure".

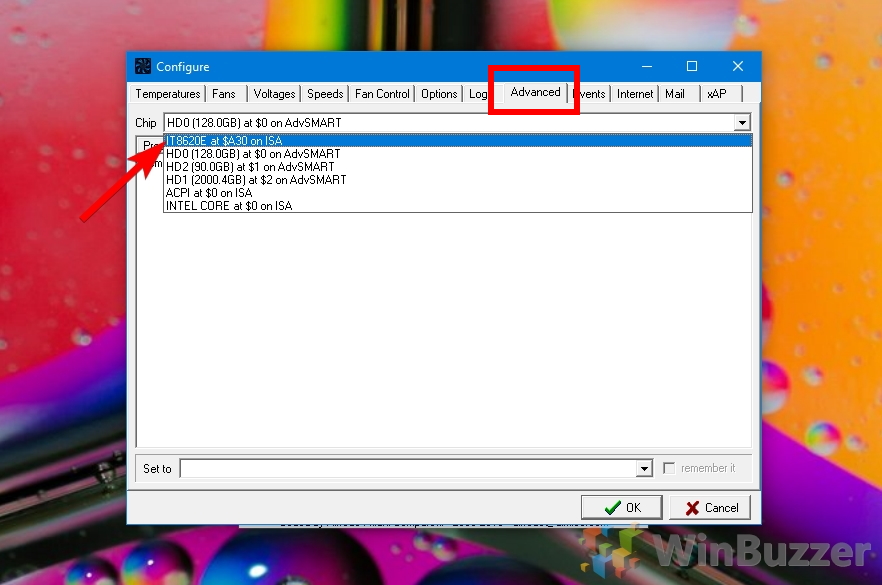
- Select your chip
In the "Avant-garde" tab, click the drop-downwards next to "Chip" and select the entry that starts with "IT" and ends with "ISA".
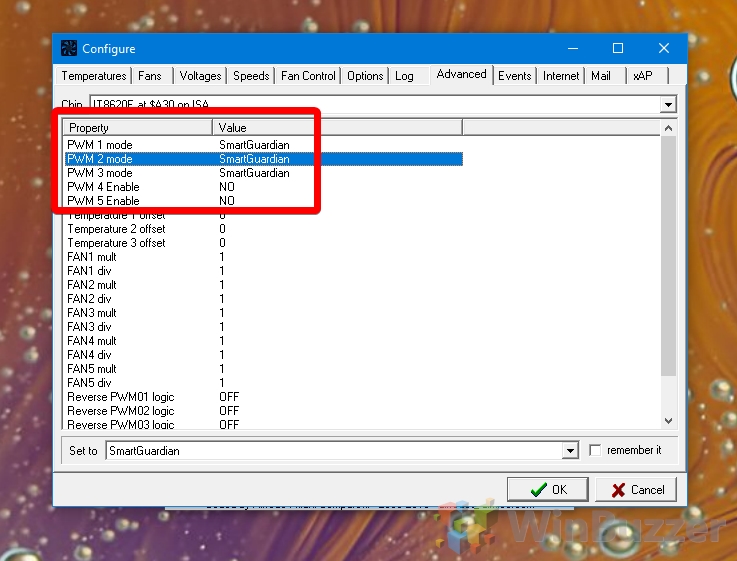
- Find your PWM settings
If you don't accept an IT-ISA entry, your PC may not back up fan control, but yous tin click each bit and look for switches with "PWM i mode", PW 2 fashion", etc., which represent the available fan controllers and respectively fans. Where information technology shows "NO", no fan is connected. The active fans ordinarily show "SmartGuardian" as value, which stands for fleck-based control.
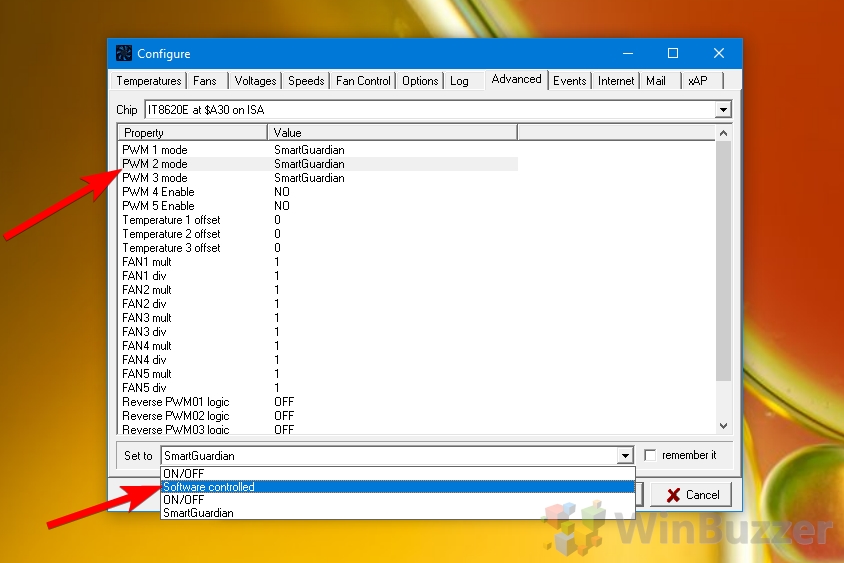
- Set up PWM to software controlled
On each of the PWM entries, change from "SmartGuardian" to "Software controlled"to let SpeedFan take over control.
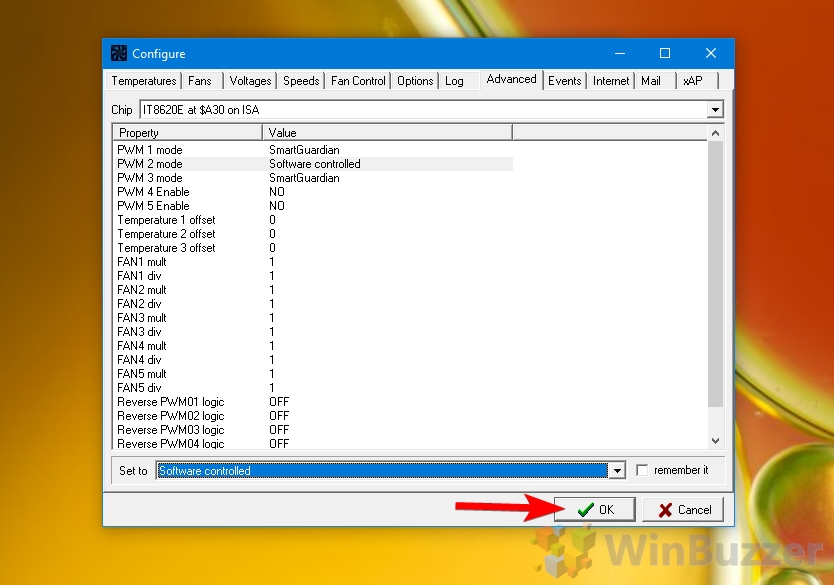
- Make it permanent
Optionally, you can check the "call up information technology" box to brand these changes persist. We mostly don't recommend this until you take a fan profile you're happy with. Printing "OK".
- Check fan speed
The chances are that you accept ane particular piece of hardware that'due south performing worse than the others, typically the CPU or GPU. Y'all tin check which PWM controls the fan for each component by adapt their values to 0 individually and seeing which component the temperature rises for. Be certain to note this downwardly and gear up them back to their previous values afterward. You can then slow down the fans then that they're quiet simply the temperatures are still within the tolerable range for a quick general web browsing profile.
- Fix automatic fan speed or configure
Alternatively, you lot can utilize SpeedFan for more circuitous fan speed command. Tick "Automatic fan speed" to have information technology do the heavy lifting for y'all, or configure if you aren't happy with its decisions.

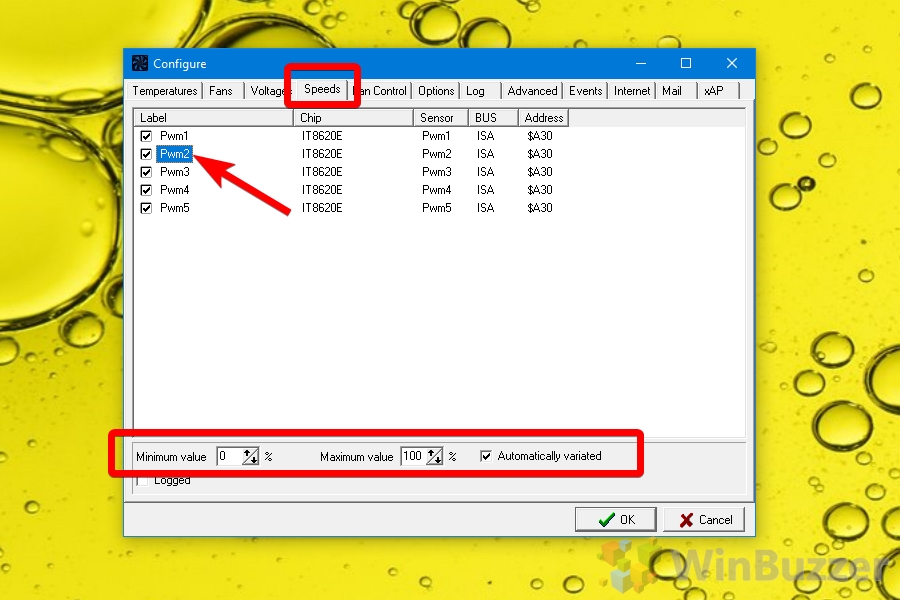
- Prepare a minimum and maximum PWM value
In the "Speeds" tab of the configure window, you can set minimum or maximum percentages for each fan. Ticking "Automatically variated" with let SpeedFan retain some automated fan speed command but ensure it doesn't go above or below those values. You should exist aware of your each hardware component's temperatures before adjusting this.
Source: https://winbuzzer.com/2020/06/12/how-to-use-speedfan-for-fan-speed-control-in-windows-10-xcxwbt/
Posted by: popetwild1986.blogspot.com
0 Response to "How To Change Fan Speed On Windows 10"
Post a Comment